How to Create a Video from Photos
The best way to organize photos from a vacation, party, or other significant event is to create a video from photos. This way you will only need to have a single slideshow video file that you can easily send to your friends and family to share. If you make video from pictures you don't need to manually change the pictures, you can add some text for some or all of the photos and even add a soundtrack. All you need to do to reach the goal is to use a decent photo video maker like Icecream Slideshow Maker. With its intuitive interface, this program offers you a way to create a video slideshow from photos in just a couple of easy steps.
Install the photo video maker software
Download Icecream Slideshow Maker from our website and complete the setup process. Launch this easy-to-use picture video maker to proceed.
Add photos for the slideshow
The easiest way to add photos to the slideshow is to drag and drop them. Note that only the supported image formats (JPG, JPEG, BMP, PNG) will be added to the photo video maker's queue. The “Add Photo” and “Add Folder” buttons add separate images or whole folders with images using Windows Explorer, respectively.
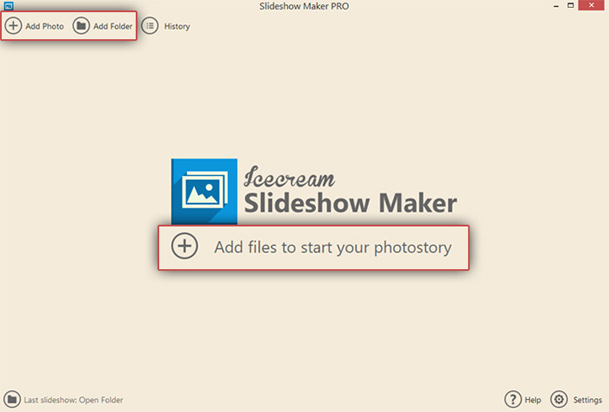
Photos can be rearranged (drag the images or highlight needed files and then use Up and Down arrows to move them), shuffled (click the “Shuffle Photos” button), and sorted into alphabetical order.
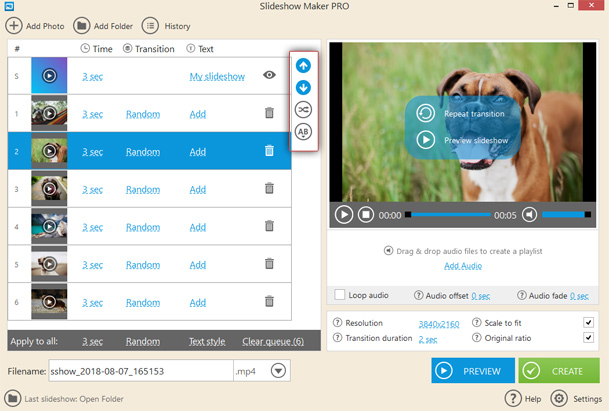
Set transitions
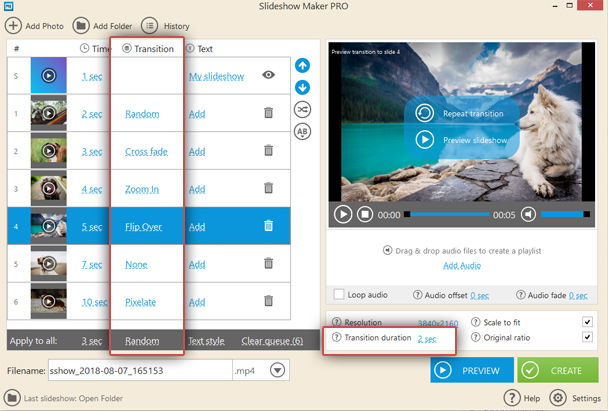
When creating a video from photos, you can make it look more professional with the use of transitions.
After you add the files to Icecream Slideshow Maker, a “Random” transition effect is applied for all the slides' changes. Thus the slideshow automatically becomes more vivid thanks to the wide variety of transitions. It's also possible to set a certain transition effect per slide or to select no effect at all (using the “None” option). The duration of transitions can be set to 1, 2, or 3 seconds.
Add music to your video (if needed)
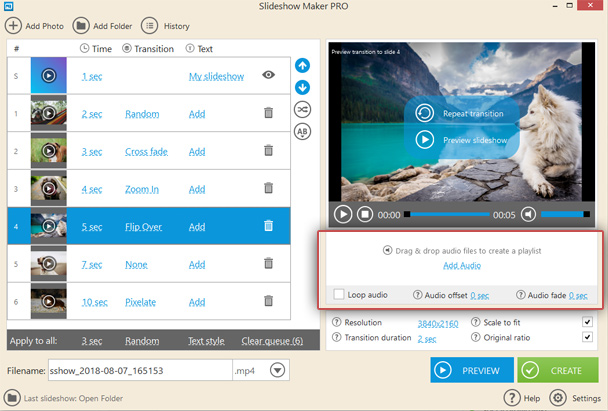
Before you make a video from pictures, it might be a great idea to add some music in the background. Audio files of the supported formats (MP3, M4A, WAV, WMA, OGG, FLAC) can be dragged and dropped into the corresponding area. The “Add Audio” button opens Windows Explorer to add the files manually to the picture video maker from your PC. You can easily change the order of the added tracks by dragging them to the required place in the playlist. To loop audio, enable the “Loop audio” option. We recommend you apply offset and/or fade options as well (“Audio offset” and “Audio fade” settings).
Create video from your photos
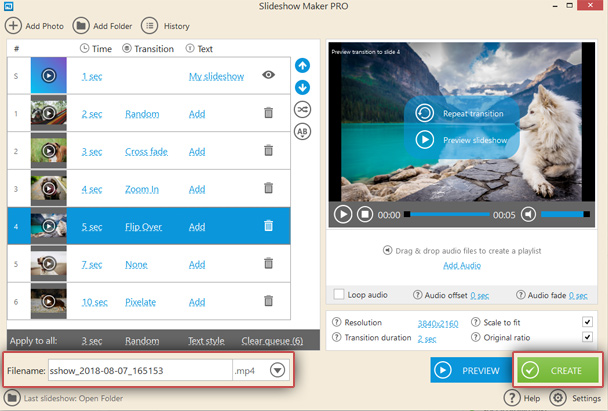
Now you can proceed to the creation process. Make sure the video's name is correct under the image queue, or change it if needed. Also, you can choose the output video resolution and format (MP4, AVI, MOV, WebM).
Click the “Create” button to create the video from photos with Icecream Slideshow Maker. The progress bar will notify you about the slideshow's creation status.
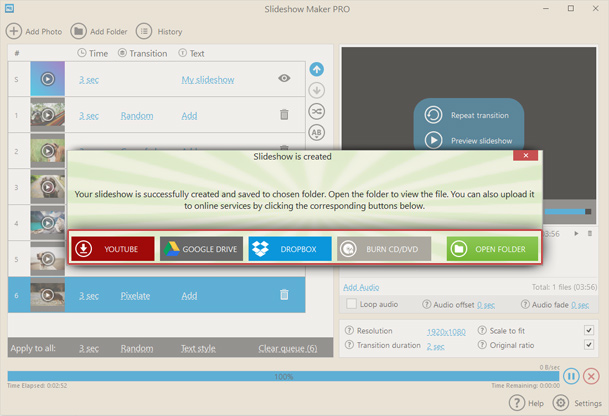
As soon as the photo video maker creates your slideshow, you can open its containing folder and upload the video to YouTube, Google Drive, or Dropbox, or burn it to DVD.
With this quick and easy tutorial on how to make video from pictures, you can create great slideshows with Icecream Slideshow Maker. Contact our Support Team if you have any questions.

